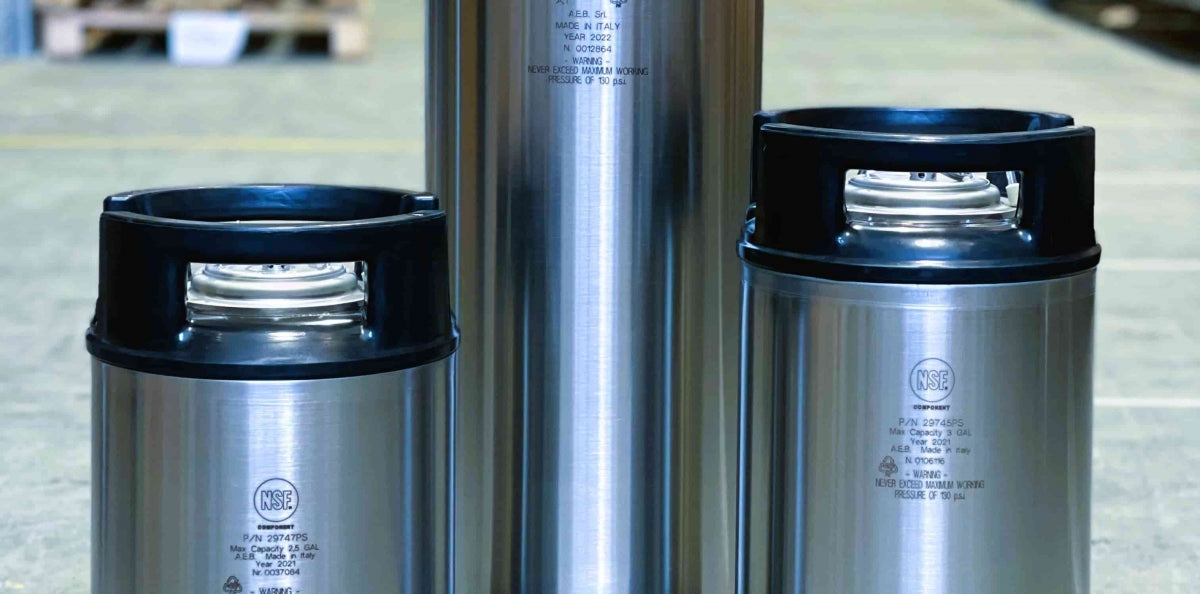
Most people who brew their own beer start with bottle conditioning, but at some point many get tired of washing bottles. That is when kegs come into the picture, and it is time to move on to cornelius kegs. The benefits of cornelius kegs are many, which we will look at more closely now. How keg carbonation works in practice is also an interesting aspect in this context.
Cornelius kegs - the practical solution for homebrewers!
There are several types of keg, such as one-way kegs from PolyKeg and KeyKeg, which are mostly used by professional breweries. For homebrewers, cornelius kegs are the most common. They are made of steel, which means they can withstand both knocks and chemicals. They come in several sizes and can be reused almost indefinitely:
- Less work with cleaning, bottling and storage.
- Less oxygen in the beer, better quality and shelf life.
- The option of connecting a tap or a beer tower.
- The beer is ready to drink sooner.
- More control over the carbonation level.
To get started, you need more than just the keg itself. This includes a pressurised CO2 bottle, a regulator to adjust the pressure going into the keg, plus the hoses and fittings for it. To make this really easy, we recommend a keg kit with a cornelius keg that includes everything you need to get started carbonating beer in a keg.
It should still be mentioned that it is possible to fill bottles or cans with ready-carbonated beer. For this we recommend using, for example, a Beergun, Tapcooler, Pegas or similar solutions.
Cornelius kegs were originally made for Coca Cola and Pepsi syrups, but are now used mostly by homebrewers around the world. They were originally produced by Cornelius and AEB, among others, and these are the same kegs we still stock. The largest keg was originally 5 gallons (18.9 litres), but because Norwegian and European homebrew batches are larger than the American standard of 5 gallons, we have had 20L cornelius kegs developed by AEB. We also stock 23L cornelius kegs, which offer enough room for the whole 25L batch once it has finished fermenting. We think this is the ideal size if you are unsure which keg to buy.
Below you can see an example of a "keezer", a chest freezer full of cornelius kegs with the temperature controlled by, for example, an Inkbird temperature controller.

Read more about choosing a dispensing system and taps in our related blog article on serving beer from a keg.
Cleaning cornelius kegs
When you have bought a new keg, or when you have emptied one, it should be washed before use. For this we recommend hot water with a suitable cleaner and a good brush. A good aid that makes the job even easier, especially if you have several kegs, is Marks Keg Washer or FastWasher Rack. For new kegs, or kegs that are not very dirty, we recommend Chemipro Oxi. This is a cleaner that also sanitises, so it does not need to be rinsed out after use. For dirtier kegs we recommend PBW instead.
Once the keg is clean, it must also be sanitised in the same way as bottles, for example with Saniclean, which foams far less than, for example, Star San.
Purging and oxygen-free transfer of beer
Beer is vulnerable to oxygen. If it gets too much oxygen, it will turn darker, lose flavour and often develop an unpleasant cardboard aroma. All types of beer can be damaged by too much oxygen, and hop-forward beer is particularly vulnerable.
There are many ways to avoid oxygen in the keg, and a whole article could be written on this alone. The simplest thing you can do is to pressurise the keg and pull the pressure relief valve a few times. Much of the oxygen in the keg will then be pushed out and replaced by CO2. This should be done both before and after you fill the keg with beer, for as little oxygen as possible.
How to transfer beer to a keg
When the keg is clean and sanitised, it is ready for beer. Here too there are several methods. We have chosen to describe the simplest one for you:
- Use a siphon with a hose, or connect a hose to the tap on your fermenter if it has one. Remember to sanitise the siphon/tap and hose first.
- Place the hose right at the bottom of the cornelius keg, so there is as little splashing as possible that could mix in air. At the bottom of the keg there is also a blanket of CO2 after you purged it before filling, which gives decent protection against oxygen.
- You can now transfer the beer to the keg. When the beer has been transferred, put the lid on (remember to sanitise that too).
- It can be tricky to get the lid to seal. We therefore recommend Keg Lube as an aid. It also lubricates the O-ring so it lasts longer and avoids cracking.
- When you then apply pressure, the lubrication from Keg Lube will help seal everything.
- On the cornelius keg, “in” is marked on the rubber handle, so it is easy to find the right port.
Closed transfer to a cornelius keg
Alternatively, we can do a closed transfer. This means the beer does not come into contact with air on its way to the cornelius keg, which greatly reduces oxygen exposure. Again there are several ways to do it, but the principle is the same: connect a hose to the tap on the fermenter and put the other end on the outlet (black connector) of a sanitised and purged keg with no pressure. Open the pressure relief valve so no pressure builds up in the keg along the way. It can also be a good idea to use scales to see how much you are filling, so there is not too much in the keg or, in the worst case, it overflows. If the beer is cold, you will see condensation forming on the outside of the keg, and can use this as an indicator of how much has been transferred.
We do not recommend filling above the CO2 dip tube (the short tube at the very top of the keg). This is to avoid beer flowing back into the regulator if the pressure changes, for example if the CO2 bottle runs empty. If you still want to fill the keg right to the top, there are safety solutions for this too, such as a check valve or a ball lock with a built-in check valve.
Carbonating beer in a cornelius keg
There are two methods we can use to carbonate the beer. One is the same as natural carbonation in bottles, where we add sugar and leave it at room temperature for a couple of weeks. This method works perfectly well, but once we have CO2 under pressure there is a simpler and more practical method: forced carbonation. Forced carbonation can be done in several ways, but the safest method for a good result is to use a carbonation chart.
To keep it simple, you can use the following approach: apply 1 BAR of pressure to the keg and hold it there for 1 week at fridge temperature of about 3–5 degrees. Most beers will reach a good carbonation level this way. The gas should be connected and on the whole time. As long as the pressure is not increased or the temperature in the keg does not rise, the beer will become saturated and can never get more carbonation than the pressure you have set.
Reading a carbonation chart
To dial in the carbonation precisely, we recommend using the chart below. It can be a bit confusing the first time you look at it, but it can be read like this:
At the top, PSI and BAR are given. These are two different units of pressure. Most regulators show both. In Norway we normally use BAR.
Temperatures are given on the left-hand side. The lower the temperature of the beer, the more easily it absorbs CO2. So we can use this chart to work out exactly which temperature and pressure to use to reach the chosen volume. Volume is a unit that describes how much carbon dioxide there is in a beer. At the bottom of the list there are colour codes showing recommended volumes for most beer styles.
With this information it should be possible to choose exactly how much carbonation suits your beer.
Use a carbonation calculator
Let us take an example: you have brewed an IPA. It falls under Ale, and should be carbonated to the green level in the chart. You have a fridge that holds a steady 4 degrees. From the chart we can then see that you should apply between 0.62 and 0.83 BAR of pressure to the keg. Anything between these two values is right for the style, but higher pressure gives more carbonation. It is simply down to your own taste.
Whatever pressure and temperature you choose, the keg should stand for around a week before it is ready.

There are also clever solutions that can quick-carbonate the beer for you in a short time, such as Blichmann QuickCarb.It automates the process for you and can carbonate a keg of beer in about an hour.
Other carbonation methods are 3 BAR for 24 hours, or 2 BAR at 2 degrees for 48 hours. Some also choose 3 bar and roll or shake the keg vigorously for a few minutes. These methods are generally not recommended if it is your first time using a keg. They should be used with caution, as there is a risk the beer becomes over-carbonated: that is, too much carbonation and in the worst case nothing but foam. A lot of sediment will also be stirred up, which not only makes the beer cloudy, but can also affect the flavour.
My beer is carbonated, now what?
If you have followed the chart and carbonated correctly, your beer is ready to drink after about a week. All you need to do now is connect the beer line and pour yourself a good glass of beer. Leave the pressure at the same level you carbonated at, as that is usually the best serving pressure. If you want even more carbonation, you can raise the pressure according to the chart and leave it for a while longer.
Remember that most beer styles should condition for a while to reach their optimal flavour. Even if fermentation is finished and the beer is carbonated, it may not be at its best yet.
Why does only foam come out of the tap?
If you have a beer that should be highly carbonated (wheat beer or sour beer, which are often more highly carbonated), you may have problems with foam. This can be solved in several ways. The simplest is to use a beer line with narrow tubing, also called anti-foam tubing. It is narrower, so you get more resistance when pouring, which reduces the risk of foam. It can also help to use a longer line, as length gives more resistance in the same way as narrower tubing does.
If something has already gone wrong, the beer may be over-carbonated. This can be the result of the pressure being too high, or the beer being too cold. In that case, other beer lines may not improve the problem. On top of the foam problems, the beer you pour will be “prickly” and unpleasant to drink. It can actually end up completely flat if all the carbonation disappears into foam.
To fix this, disconnect the gas and pull the pressure relief valve in the keg lid until all the pressure is gone. Shake the keg a little so the beer releases carbon dioxide. Wait a while until the foam has settled and release the pressure again. Repeat this until you reach the carbonation level you want.
If this does not help, check that all the hoses are properly seated in, for example, John Guest push-fit connectors and so on. A microscopic gap between hose and connector is enough for oxygen to be drawn into the beer line, causing foam when you pour. Cut the hose ends and reconnect, and it may improve.
If none of the above helps, the dip tube in the cornelius keg may be blocked by, for example, hop debris. You can then try to blow it clear by connecting CO2 to the beer-out post.
How do I transfer beer to bottles or cans?
Many people like to share their beer with others, or take it with them on a trip. There are several clever solutions for this. For small amounts that will be drunk the same evening, you can fill a bottle from the tap, but the risk is that the beer loses a lot of carbonation. It is also not a good solution if the beer is to stay in the bottle/can for a longer time. If it is to be stored, the Blichmann BeerGun is purpose-built to transfer keg-carbonated beer without losing carbonation, while minimising oxygen. Other options are counter-pressure fillers such as TapCooler or PEGAS. An automatic can filler such as DuoFiller is warmly recommended if you are canning larger amounts of carbonated beer.