Pressure fermentation has taken off among homebrewers recently. Why has it become so popular, and how is it done in practice?
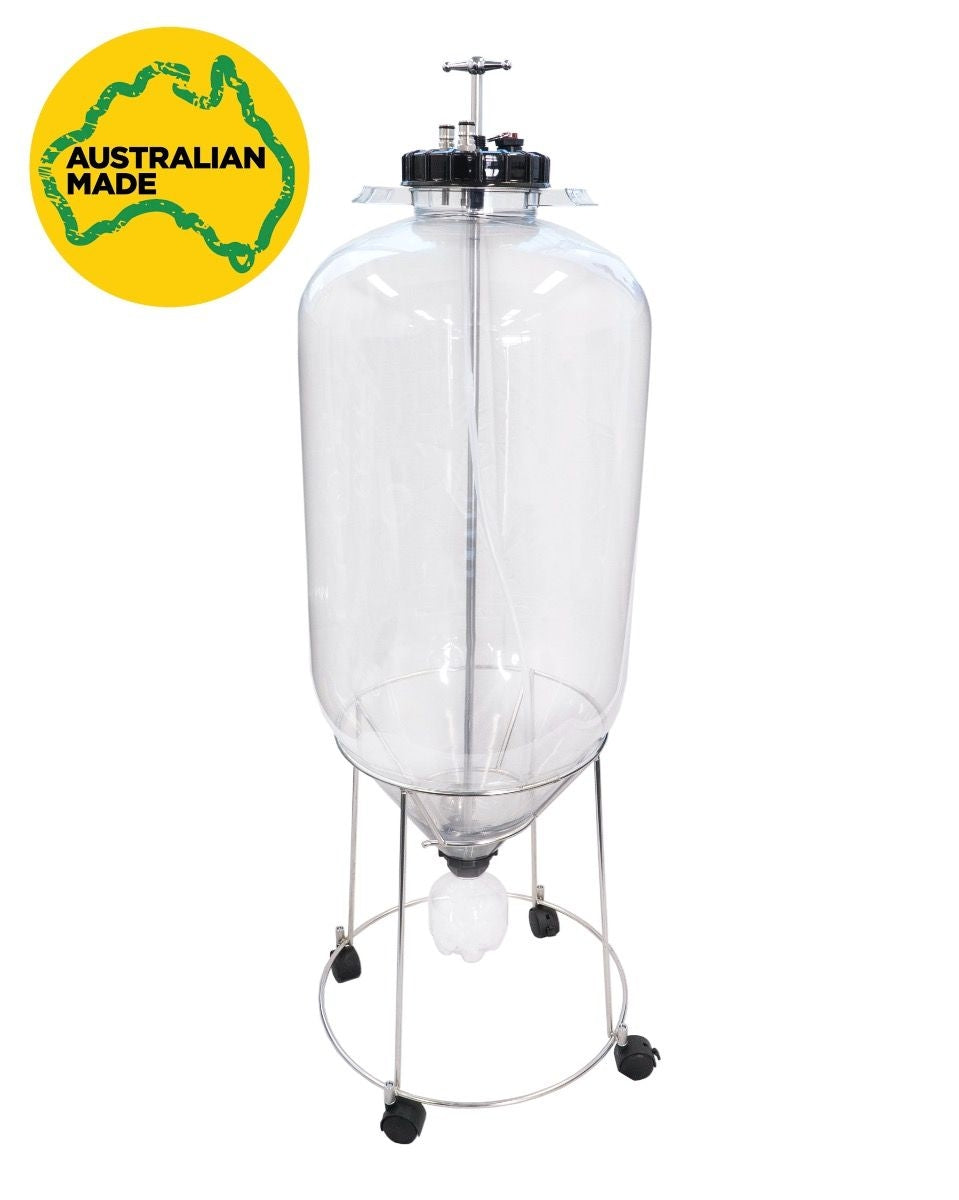
Breweries have done it for many years with professional equipment in larger volumes, but recently pressure fermentation has become a huge hit among homebrewers. Much of the reason is that more affordable plastic alternatives have appeared, able to ferment a volume that is more manageable for homebrewers. We are talking about the first version, the original Fermentasaurus produced by Keg King in Australia. Over time this has been upgraded and developed further into today's Apollo Unitank and Apollo Snub Nose from the same manufacturer, which are the most reliable and safe PET plastic pressure tanks on the market. Apollo is manufactured and individually pressure-tested by Keg King in Australia, unlike the competitor, which is made in China.
Advantages of pressure fermentation
- Higher temperatures: Pressure fermentation considerably suppresses the yeast's ester production, and can even let you brew pilsner and other bottom-fermented beer styles at higher temperatures than are traditionally used. This makes it possible to succeed with a pilsner even if you do not have rock-solid control of the fermentation temperature. For hop-forward beer styles the aroma can also be stronger, as it is forced into the beer instead of evaporating straight out of the airlock.
- Closed system: A pressure tank is completely closed, so there is no risk of oxidising your beer. Such a closed system also opens up more options for closed transfers or serving straight from the tank.
- Carbonate and serve straight from the tank: A fermentation tank that can hold pressure can in practice be used in the same way as a Cornelius keg. In other words, you can fully carbonate your beer in the fermenter and serve directly from it. Combine this with, for example, a Beergun or Duofiller, and the beer will be completely oxygen-free from the moment you pitch the yeast until it comes out finished in a bottle or can.
Disadvantages of pressure fermentation
- The yeast can become stressed: Most commonly used yeast strains cope perfectly well with a bit of pressure, but some strains can be a little stubborn. In the worst case the yeast will stall along the way and not ferment out as far as you originally expected. Also remember that some beer styles actually SHOULD have a significant ester flavour from the yeast, which pressure fermentation can in the worst case reduce so much that the beer becomes too clean in flavour.
- Price and equipment: Although there are excellent stainless steel pressure fermenters, such as the Brewtools F series or the Unitank from Ss Brewtech, plastic pressure tanks such as Apollo and Fermenter King have become a big hit among budget-conscious homebrewers. It is also possible to use an ordinary Cornelius keg, but you will need some extra equipment regardless, such as a spunding valve (adjustable pressure relief valve) and a CO2 cylinder. See more under “required equipment”.
Required equipment for pressure fermentation
The fermentation tank
First and foremost, you need a fermentation tank designed to withstand pressure. There are several options depending on your needs and wishes, and not least your budget.
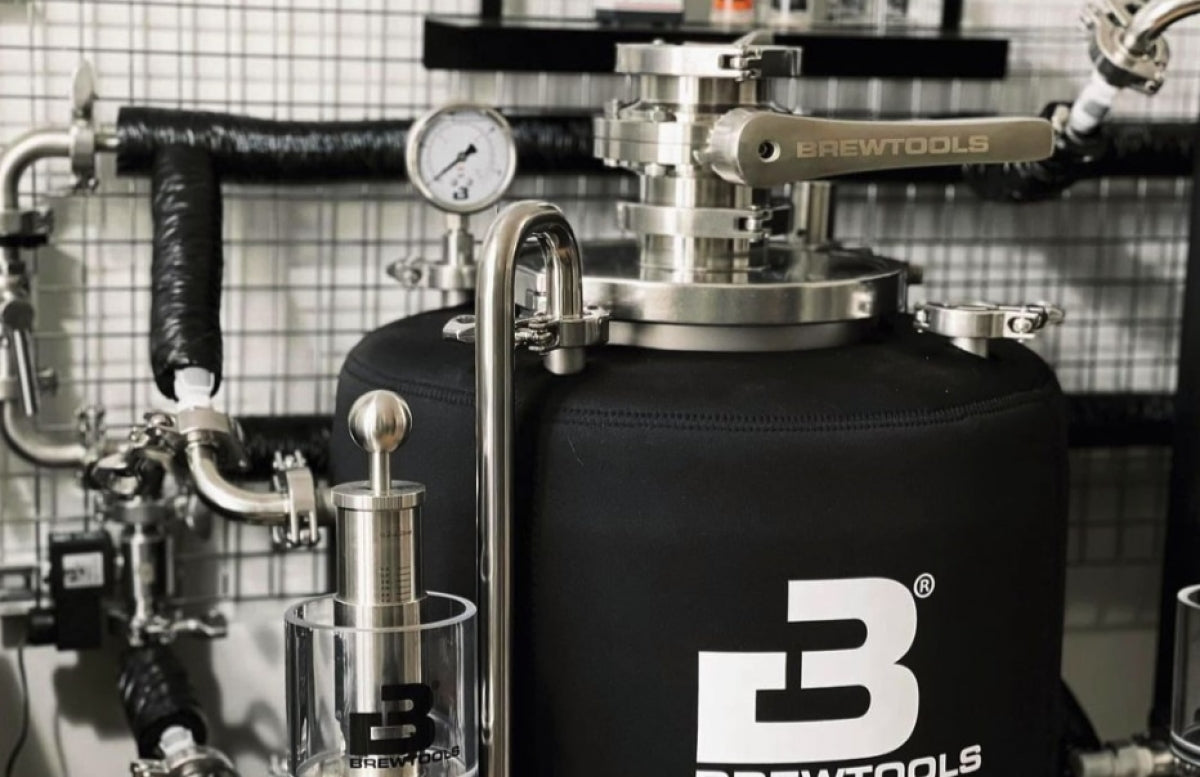
The F series from Brewtools, such as the F80 Unitank in the picture, is among the most impressive on the market today, with flexible solutions, features and accessories that make the fermentation process a dream.

Apollo Snub Nose and Unitank from Keg King are further developments of the original plastic pressure tank, the Fermentasaurus, and are affordable yet safe options for getting started with pressure fermentation.

Cornelius kegs can also be used for smaller batches. But remember that there will be a fair amount of sediment during fermentation, so it can be an advantage to cut the dip tube, or use a floating dip tube that draws beer from the top of the keg when serving. Our 23L Cornelius keg is best suited, given that you also need some empty space (headspace).
CO2 cylinder and hoses
To make full use of a pressure tank, a CO2 cylinder will make your day much easier. In addition, you of course need a CO2 regulator and the necessary hoses, both to get the gas into the fermentation tank and to get the finished beer out of the tank.
Spunding valve
The yeast produces lots of CO2, and even when you ferment under pressure, it is important to have control over how much pressure is in the tank. For this it is smart to have a spunding valve, with which you can regulate exactly how much pressure is in the fermenter and how much excess is released. Here, for example, the original and affordable Spundy is an excellent solution, or Homebrewer Lab's SPUNDit 3.0, which can control the pressure for up to two tanks at once. If you do not need fine adjustment, PRVs (pressure relief valves) that release at different pressures are also a simple solution. Three different versions of these are included with the Apollo Snub Nose.

The fermentation process
The process itself is quite simple and straightforward. Fill the fermentation tank with wort as usual and add the yeast. For the first couple of days it is recommended to ferment without pressure, to get the yeast well under way before you tighten the spunding valve. This way you also purge much of the oxygen left in the tank before the pressure builds. Then just let the yeast do the rest of the work. It really is that simple!
Since pressure fermentation reduces off-flavours and esters, your beer can be ready to drink after a very short time. If the pressure is set correctly, all you have to do now is chill it and serve fully carbonated beer straight from the fermentation tank! There is no fixed answer for how long it will take, so taste it after a week or so and check whether it is getting close. The beer style you are brewing, the yeast you have used, the fermentation temperature and the pressure you have used all play a part, of course. Remember that pressure fermentation will reduce off-flavours, but it is not a magic solution for all off-flavours.
What pressure should I ferment at?
The pressure varies according to personal preference, beer style and choice of yeast. The pressure you choose can accentuate or subdue different flavours in the finished beer. 0.7–1 bar is common, but that is far from a fixed rule. Also remember that the pressure will affect the carbonation of your beer in the end.
John Blichmann and Chris White have tested exactly this with a lager, and the results show significant differences. In short: at 1 bar of pressure, esters and diacetyl levels were reduced considerably. Above 1 bar they were subdued even more, but the malt character was also drastically reduced, and the bitterness became more prominent. Feel free to read the whole article and go into more depth.
Dry hopping during pressure fermentation
If you are going to dry hop the beer under pressure, it is important to think about how you will do it in practice. If you want to add the hops under pressure, you should have a «hop dropper» or a similar tool as an intermediate station for the transfer. Closed dry hopping under pressure is particularly relevant when dry hopping heavily hopped beers such as NEIPA, which, because of the amount of hops, carry a greater risk of oxidation.
If you release the pressure before dry hopping and do it the "old way", you need to watch out for oxygen sneaking into the fermenter, and not least for the carbonation in the beer reacting with the hops and creating a foaming geyser effect. After any dry hopping where the pressure has been released, it is also important to add pressure from a CO2 cylinder. This is important to prevent a large build-up of krausen, which in the worst case can clog the pressure relief valve and the spunding valve. Once it has been pressurised, you can also pull the pressure relief valve to replace the oxygen in the tank with CO2.
Be careful!
When working with pressure, there are strong forces at play, and it is important to treat them with some respect. Be especially careful to set the spunding valve correctly, and make sure the pressure relief valve is not stuck. If the tank is shaken with wort in it, wort can in the worst case harden in the valve so that it gets stuck.
Also take care if you use plastic tanks. We recommend the original tanks from Keg King, manufactured and individually tested in Australia. Acid-based cleaning agents/sanitisers should be rinsed out after use, as they can weaken plastic tanks and pressure relief valves over time. Do not clean plastic tanks with hot water!
Make sure you have enough headspace when pressure fermenting. Contrary to what many people say about needing less headspace when fermenting under pressure, 15–20% headspace is recommended. This is important to make sure the krausen does not build up so that the pressure relief valve and spunding valve become clogged.
Thanks to Masteringhomebrew for sharing the cover image for this article. Get inspired on Instagram.